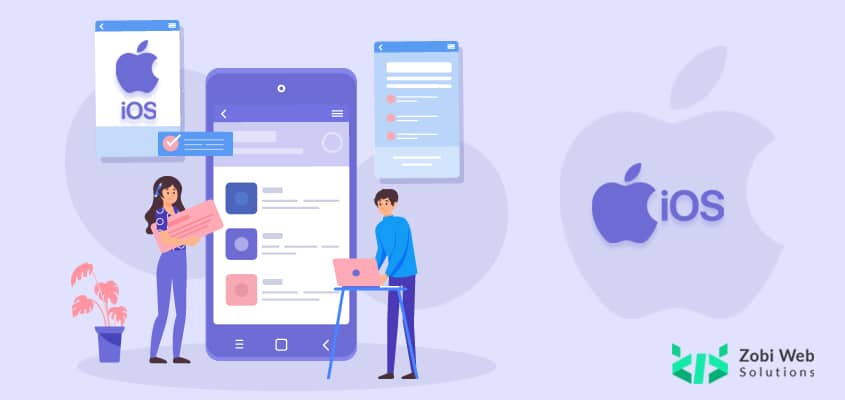
Do you wish to integrate Apple Pay in your iOS app? Apple Pay is one of the leading mobile payment systems in the world and offers benefits such as contactless, secure, and easy payment. If you wish to include Apple Pay in your app and make it a more viable payment method, this article is for you. But make sure you know how to integrate Apple Pay into your iOS app before you start writing your code.
IOS app development is not easy, hence we recommend hiring an iOS app development company for such tasks.
Apple Pay is a secure and easy-to-use payment option for users, which will help you enhance the user experience of your iOS app. Awareness of payments is essential in today’s competitive market. By paying the right amount, you can expand your business to a large scale in no time. However, adding another payment method requires a lot of work on its own and will increase the challenges that come with this task. You need an iPad or iPhone to pay with Apple Pay and it also requires an App Store account where you can download an updated app that supports Apple Pay features.
Importance of Apple Pay Integration:
Apple Pay is a mobile payment system that is built into the latest version of the iOS mobile operating system, iOS 9. It allows you to accept and process payments through an app on the iPhone, iPad, and Apple Watch. With Apple Pay, you can customize your app to include functions such as loyalty programs and in-app purchases by connecting it with your bank account.
However, if you want to accept Apple Pay in your iOS app, you need to have it integrated into the app. Here are some tips on how to integrate your app with Apple Pay.
Important Features:
- It offers secure, contactless payments with an integrated fingerprint reader on the iPhone and Apple Watch.
- You can use Apple Pay on retail apps, e-commerce websites, and in-app purchases.
- When you use Apple Pay, all your credit cards, loyalty programs and offers, and special rewards are stored in Passbook.
- Apple Pay can be integrated with your existing payment systems such as Visa/MasterCard/American Express (via a compatible card reader) or PayPal account (via PIN). It supports multiple currencies such as Canadian dollars or Australian dollars.
- Remember that each app is different. Therefore putting in the same code for your app will not work. You will need different components to integrate with Apple Pay in your iOS application.
How to Integrate Apple Pay into Your App?
Integrating Apple Pay is not a difficult task if you follow these steps:
Organize your components: All elements of the payment system should be created and placed into the project before you integrate it with your application.
Integrating Apple Pay into an iOS App:
The integration process with Apple Pay is as easy as downloading the SDK and building an app. But before you can integrate it, you need a new target. Apple defines an iOS app as a “single app.” Therefore, if your app is already running, it will not work to add Apple Pay.
The steps to integrate your iOS application with Apple Pay are listed below:
1. Creating a new Merchant ID:
Go to the service provider’s website. Note that you can sign up for Apple Pay by creating your other apps as well. You will also get access to card details and payment history as well. After signing up, you will be sent a new merchant ID which is used to create receipts and invoices in your app.
2. Configure Apple Pay Capabilities in Xcode for your project:
- You will need to create a bundle ID to enable your iOS app to receive payments via Apple Pay.
- Go to the Xcode menu and select “Show All Files”. Then, double-click on the project file that you have created in step 1 in this article.
- In the project file, go to “Build Settings” (in the top menu).
- Enter the bundle ID of your app into “Identifier” and click “Done”.
- At this point, your code needs to be altered so that it enables the payment capabilities of your app. In your AppDelegate.m file, search for “@objc” and add the following.
- Then you have to add an entry point so that your app can receive payment information. You can use the Apple Pay + or Apple Pay ++ entry point codes depending on whether you want to support both card-present and card-not-present environments or just one of them.
Note: If your app is supporting in-app purchases as well as regular payments, it means that you will be performing two separate transactions with two separate merchant IDs. Therefore, when using Xcode, enter a prefix for both “Merchant ID Prefix” and “Secure Merchant ID Prefix”. Don’t use any prefixes that are already being used by other apps.
3. Create a sandbox user in iTunes Connect:
You will need to create a sandbox user and enable it to test Apple Pay. You can do so by logging into iTunes Connect, going to the “Users” section in ” My Apps”, and clicking “Add Sandbox Testers”.
Set up your sandbox user’s device by generating an explicit test certificate from your Apple developer account. Then enroll the device into the Apple Developer Program and enable your app for testing.
Example:
After you have implemented Merchant ID, you need to update your app description as well for it to communicate with Apple Pay.
4. Include a test card:
Download the test card image for your app. You will be asked to input a card number and a card type. For example, you can use this code.
When you have an approved test account, download a test card image of the same kind as the one in your app. You will be asked to input these details as well:
Enter the test card number and its expiration date into your Xcode project.
5. Create a receipt within Apple Pay:
You will need to create a receipt within your app’s sandbox user’s iTunes Connect account.
Create an invoice or receipt within your app; it should include all information that is relevant to you. You will find out the information needed in your test card and the test account that you have set up.
Once you have created a receipt, you will be able to create requests through Apple Pay. You can also use Xcode to create your receipts; this works better because Xcode allows you to customize the information on demand.
6. Make a payment request for your project:
After the receipt has been created in iTunes Connect, you can create a request in your Xcode project.
You will be able to see the information required by a contactless payment such as the amount, date, and card type in your receipt. Also, you can add more information to your requests such as the item to purchase, the discount you need, and the items that you want to purchase.
Besides, you can also create a financial offer within your app. After the payment is successful, the merchant will receive a payment token.
To add Apple Pay to your app you will need the developers’ support, so hire Zobi web solutions. Our iOS developers have developed different types of Payment Applications, Offline Payment Applications, and online payment applications. The iOS app development team can assist your business to integrate Apple Pay into your iOS application. We will add the code for Apple Pay to your app and also help you to integrate Apple Pay with your existing payment systems. We will add different payment options and help you to integrate Apple Pay and other payment methods. So hire iOS app developers right away and integrate Apple Pay into your app today.
How Zobi Web Solutions can help you?
Zobi Web Solutions works with advanced technologies and frameworks to provide various payment integration services. You can choose us to get the best possible solution to integrate your payment card into your app.
We have a wide range of payment gateways like PayPal, Visa/MasterCard, American Express, and others, which you can choose from depending on your needs. We have handled various payment systems such as Visa Checkout, Apple Pay (including Google Wallet), Stripe Checkout, and in-app purchase charges. We have a team of developers who are ready to help you with all possible solutions in the world of payments. Hire iOS developers to get Apple Pay in your iOS app.
You can hire iOS developers from us to build an eCommerce app that accepts Apple Pay. We have worked on various payment systems such as PayPal, Visa/MasterCard, and American Express. We have a team of experienced eCommerce developers who can easily integrate your system with Apple Pay. They will help you to get the best payment gateway in the world.
Summary:
Our team of iOS developers has helped many companies to integrate Apple Pay into their apps. They have a proven track record and they are the best company in the field of payment gateways. Since you need experts to build your application, Zobi Web Solutions is the best option for any business when it comes to software development. Hire iOS developers to get Apple Pay in your iOS app.
The primary objective of the payment system is to enable people to buy products or services using a credit card, debit card, prepaid card, or any other type of payment card. APIs like SOAP and REST allows merchants either directly or through gateways like PayPal or 3rd party payment gateways to Integrate with Payment Service Providers (PayPal).
FAQ
Question 1. What’s the difference between a payment gateway and a payment service provider?
Answer: Payment service provider offers various payment solutions and payment gateways are the ones that accept your credit/debit card for various types of transactions. To choose the best solution for your business, ask our team of experts.
Question 2. What is an online shop app?
Answer: An online shop app is a mobile application built with an online checkout solution or a merchant account to sell products on mobile devices through the internet rather than using traditional methods like in-store purchases, mail orders, etc. Online shop apps can be used by large or small businesses to sell their products on a web platform.
Question 3. What is a web app?
Answer: A web App is an application that can be used online on a PC or Mobile to provide an end-to-end solution for your business like interacting with the customers, selling products, and providing services. You can hire expert developers from Zobi Web Solutions to develop your web app from scratch or you can get it customized to blend in with your business website. Our developers will work with you to get the best possible results using the latest technologies on a mobile device. Hire iOS developers now!
Question 4. Can I sell my products in an app without having a merchant account?
Answer: Yes, you can. The reason why it is not a good idea is that you will not be able to track your sales and use the various features inside of your app. You will be relying on 3rd party solution to track everything and handle payments, but Zobi Web Solutions can create this for your mobile app. Our developers have built mobile apps for businesses that sell products online and do not have a merchant account setup.